
Identity & Auth Providers
Standard operating procedure for provisioning Google OAuth 2.0 credentials across our enterprise architecture ecosystem.
Google OAuth 2.0 & Credential Matrix Setup
This document outlines the standard operating procedure for provisioning Google OAuth 2.0 credentials across our enterprise architecture ecosystem, explicitly targeting Flutter Mobile Clients (Android/iOS) and Web Frameworks (Next.js/Node.js).
Part I: Centralized Google Cloud Console Configuration
Before implementing any code, identity records must be established in the Google Cloud Platform (GCP) Console.
1. Project Initialization & Consent Screen
Navigate to Console
Navigate to the Google Cloud Console.
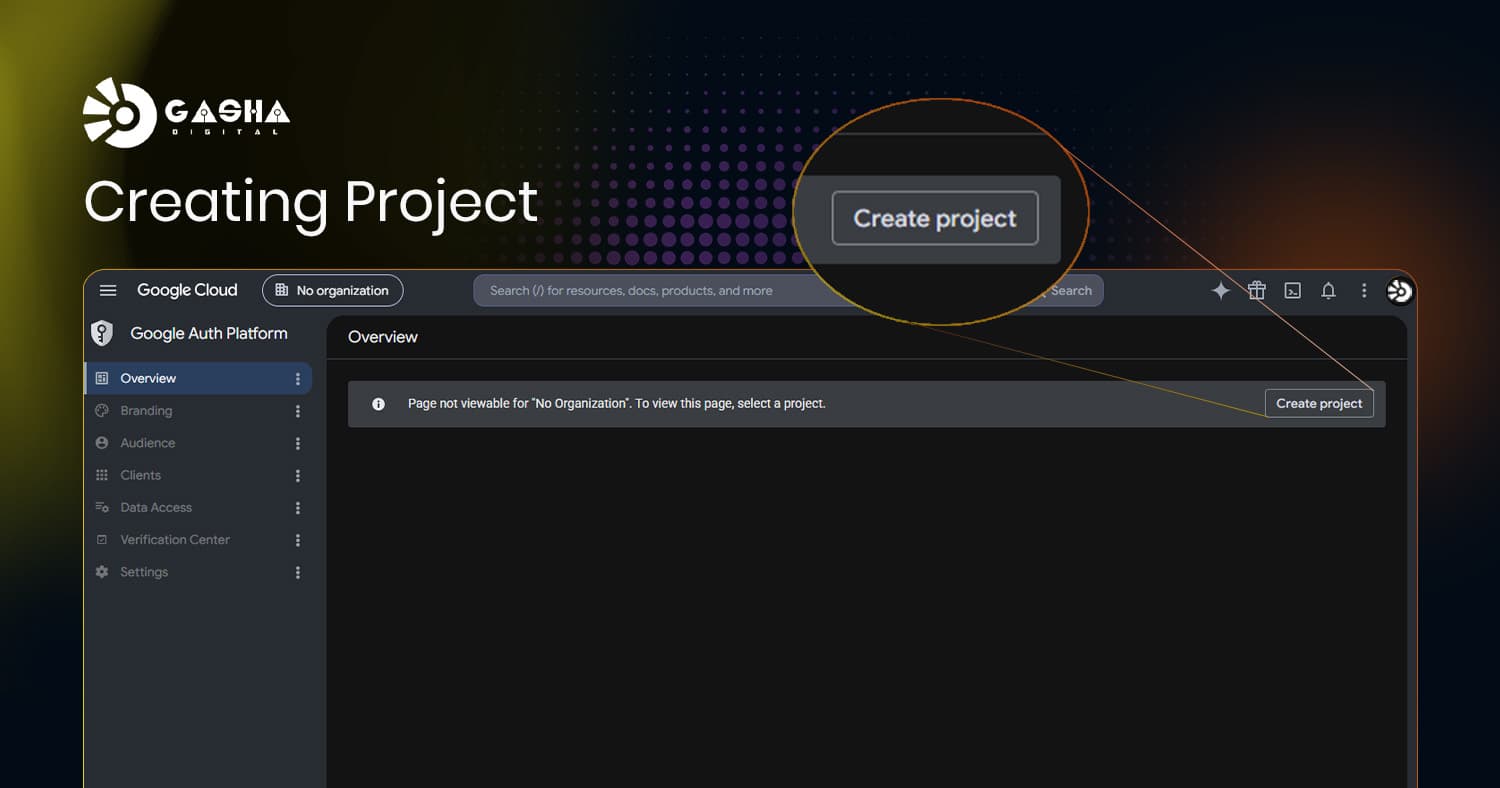
Access OAuth Consent Screen
Use the global search bar or navigate to Navigation Menu (☰) > Google Auth Platform > OAuth Consent Screen (or APIs & Services > OAuth Consent Screen).
Complete the initial project configuration by filling in your app information (such as app name and user support email), and finally click Next.
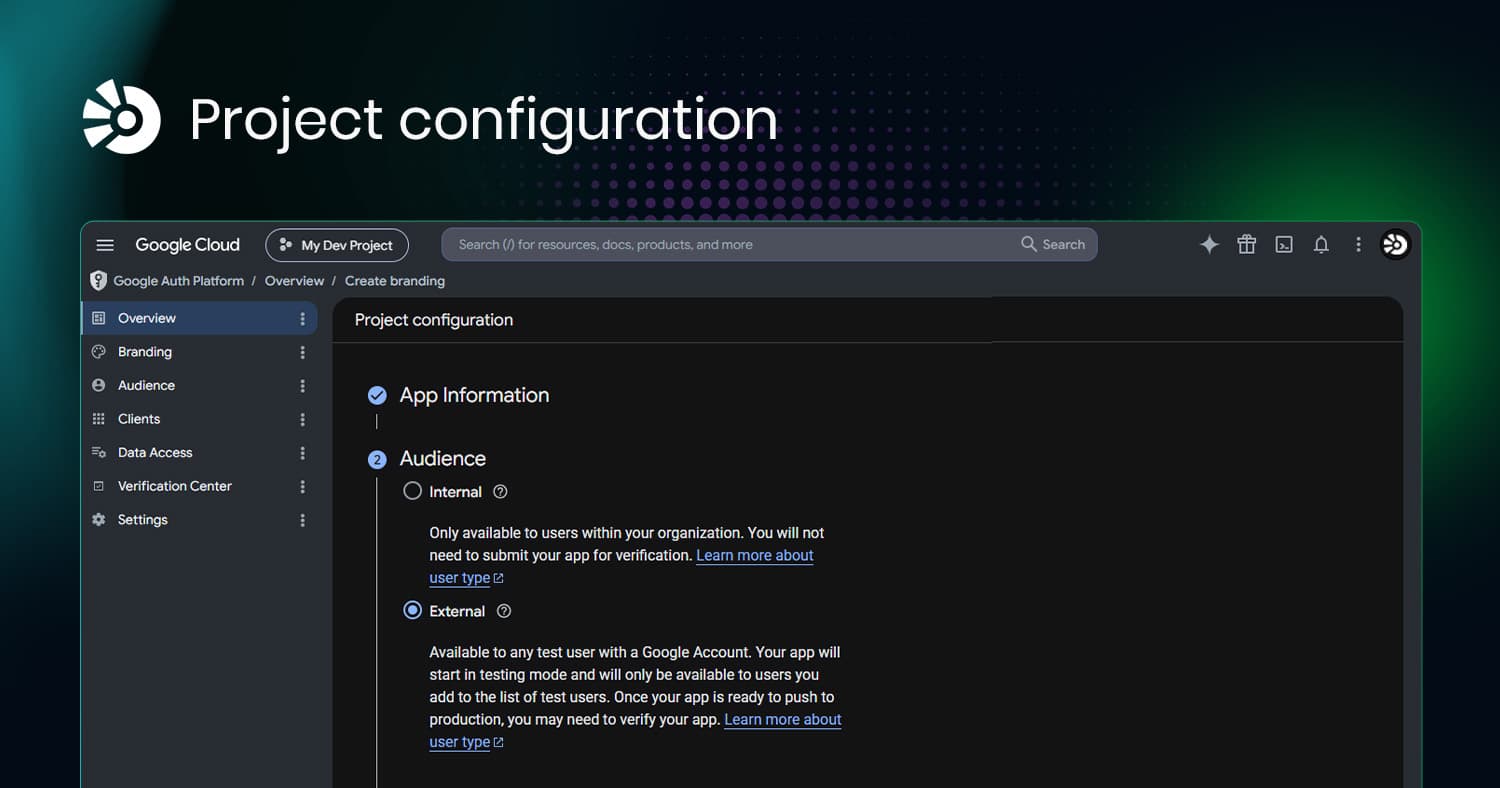
Fill Branding Forms
Fill out the required branding forms:
- App Name: Match your public product branding.
- User Support Email: Your Gasha Digital corporate support email.
- Developer Contact Information:
dev@gashadigital.com. - App Logo: This is your logo. It helps people recognize your app and is displayed on the OAuth consent screen.
Setup Audience
Add internal testing emails before shifting the application to Production status.
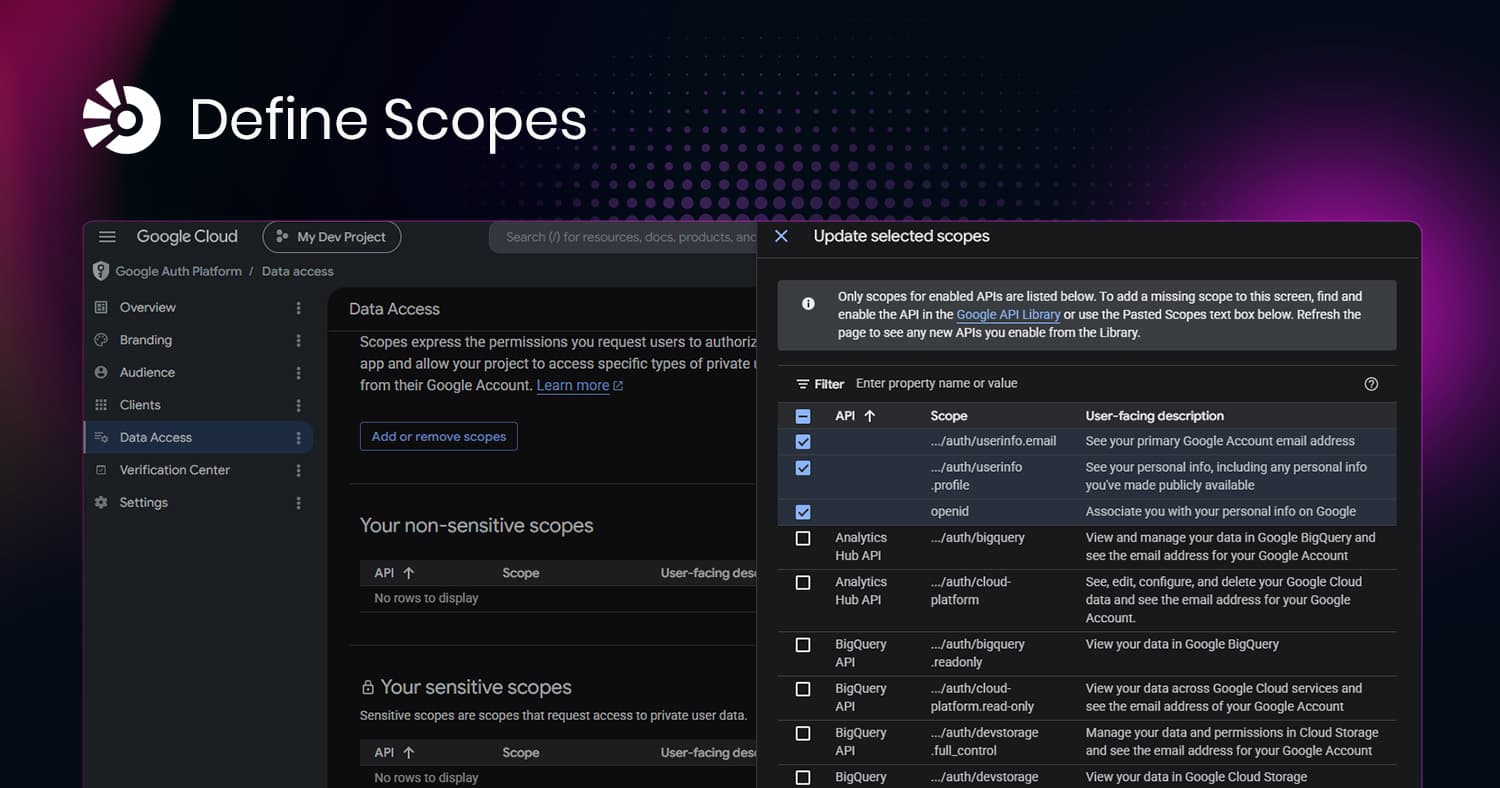
Data Access
Define Scopes: Add .../auth/userinfo.email and .../auth/userinfo.profile. Click Save and Continue.
2. Credential Generation Matrix
Navigate to APIs & Services > Credentials (or Google Auth Platform > Clients). Click + CREATE CREDENTIALS and select OAuth Client ID for each platform target:
| Target Platform | Client Type Selection | Required Input Parameters | Cryptographic Output |
|---|---|---|---|
| Next.js (Web Server) | Web Application | Authorized JavaScript Origins & Authorized Redirect URIs | Client ID + Client Secret |
| Flutter Android | Android | Package Name & SHA-1 Certificate Fingerprint | Client ID Only (Secret-less) |
| Flutter iOS | iOS | Bundle ID & Apple Team ID | Client ID Only (Secret-less) |
Part II: Platform Integration & Code Configurations
1. Next.js Web Application Integration (Auth.js / NextAuth)
Web applications use a back-end handler. The Client Secret must never be exposed to the browser client side.
Step A: Environment Configuration
Append your production variables to .env.local:
GOOGLE_CLIENT_ID="your-nextjs-web-client-id.apps.googleusercontent.com"
GOOGLE_CLIENT_SECRET="GOCSPX-your-secure-client-secret"
NEXTAUTH_SECRET="generate-a-secure-32-byte-hash"
NEXTAUTH_URL="https://playbook.gashadigital.com"
Step B: Auth.js Config Route (src/app/api/auth/[...nextauth]/route.ts)
Implement the backend router using TypeScript:
import NextAuth, { NextAuthOptions } from "next-auth";
import GoogleProvider from "next-auth/providers/google";

export const authOptions: NextAuthOptions = {
  providers: [
    GoogleProvider({
      clientId: process.env.GOOGLE_CLIENT_ID as string,
      clientSecret: process.env.GOOGLE_CLIENT_SECRET as string,
      authorization: {
        params: {
          prompt: "consent",
          access_type: "offline",
          response_type: "code",
        },
      },
    }),
  ],
  callbacks: {
    async jwt({ token, account, profile }) {
      if (account && profile) {
        token.accessToken = account.access_token;
        token.id = profile.sub;
      }
      return token;
    },
    async session({ session, token }) {
      session.user.id = token.id as string;
      return session;
    },
  },
};

const handler = NextAuth(authOptions);
export { handler as GET, handler as POST };
2. Flutter Native Mobile Integration (google_sign_in)
Mobile applications function as Public Clients. They process tokens directly inside native application shells without using client secrets.
Step A: Native Android Configuration (android/app/build.gradle)
Ensure your application package configuration exactly matches the registration on the Google Cloud Console.
To generate your SHA-1 fingerprint for your local environment:
keytool -list -v -keystore ~/.android/debug.keystore -alias androiddebugkey -storepass android -keypass androidCopy the generated SHA-1 hex string into your Android Client setup in the GCP Console.
Step B: Native iOS Configuration (ios/Runner/Info.plist)
iOS requires a custom URL scheme reverse-mapped from your iOS Client ID to handle intercept deep-linking.
Open ios/Runner/Info.plist and inject the reversed string configuration:
<key>CFBundleURLTypes</key>
<array>
    <dict>
        <key>CFBundleTypeRole</key>
        <string>Editor</string>
        <key>CFBundleURLSchemes</key>
        <array>
            <!-- REVERSED_CLIENT_ID: Reverse your native iOS Client ID string -->
            <string>com.googleusercontent.apps.your-ios-client-id</string>
        </array>
    </dict>
</array>
Step C: Dart Core Implementation (lib/services/auth_service.dart)
Initialize the wrapper. Crucial Production Requirement: When executing on Android, the GoogleSignIn instance parameter requires the Web Application Client ID passed as the serverClientId to return an auth code or ID token back to your database servers.
import 'package:google_sign_in/google_sign_in.dart';

class AuthService {
  // Always use the Web Application Client ID for the serverClientId parameter
  static final GoogleSignIn _googleSignIn = GoogleSignIn(
    serverClientId: 'your-nextjs-web-client-id.apps.googleusercontent.com',
    scopes: [
      'email',
      'https://www.googleapis.com/auth/userinfo.profile',
    ],
  );

  static Future<GoogleSignInAccount?> signInWithGoogle() async {
    try {
      // Explicitly trigger sign out before starting to force account selection UI
      if (await _googleSignIn.isSignedIn()) {
        await _googleSignIn.signOut();
      }

      final GoogleSignInAccount? account = await _googleSignIn.signIn();
      if (account != null) {
        final GoogleSignInAuthentication auth = await account.authentication;

        // Expose tokens for upstream enterprise API consumption
        print("ID Token: ${auth.idToken}");
        print("Access Token: ${auth.accessToken}");
      }
      return account;
    } catch (error) {
      print("Google Authentication Failure: $error");
      return null;
    }
  }

  static Future<void> logout() async {
    await _googleSignIn.disconnect();
  }
}
Part III: DevOps & Release Verification Checklist
Before moving credentials out of the staging cycle, verify the following configuration points:
Web Infrastructure
Domain Verification
The domain playbook.gashadigital.com is verified under your Google Search
Console profile if required for custom branding verification.
Authorized Redirect Matching
Next.js authentication routing target routes match exactly:
https://playbook.gashadigital.com/api/auth/callback/google.
Mobile Infrastructure
Production Certificate Management
When generating production APK/AAB targets for Google Play distribution, the local debug SHA-1 fingerprint must be appended or replaced with the production SHA-1 signature found inside the Play Console App Signing engine page.
Backend Security
Token Validation Lifecycle
Ensure your downstream service backend endpoints parse and cryptographically
verify the incoming payload structure (idToken) against Google’s token
validation endpoints
(https://oauth2.googleapis.com/tokeninfo?id_token=...) before granting
session authorizations.